Tuesday, July 13, 2010

Favors: Bag with Scallops

Hello Everyone! We will be making a favor called bag with scallops. I used a big shot machine and a die cut from sizzix called bag with scallops. Here's a picture of the favor:


1.) When you use the die cut, here are the different parts that you'll have: the body and the 2 sides.


2.) Fold where the score linings are.


3.) Use double-sided tape to adhere the sides of the bag. This picture shows you where to place your tape.


4.) Adhere the bottom side first.


5.) Adhere the other bottom side.


6.) Adhere the sides.


7.) I used velcro to closed the scallop tab. To do this, stick together both sides of the velcro and adhere one side first to the scallop tab. Remove the plastic of the other side of the velcro and place down the scallop tab (this will make the other side of velcro stick to the body of the bag - this will ensure that your velcro are placed properly and that they will stick together).


8.) Decorate your bag. I decorated my bag with ribbon on top, and a sentiment. Please do not forget to check out my sponsors by clicking the links on the right side or below this blog. Thank you.


Friday, July 2, 2010

Favors: Pink Dots Thank You

Hello Everyone! Here is another party favor idea. And since I received a good feedback about using pictorial tutorial, I will do my best to use pictures from now on. For this favor, we will be creating a box from a scratch without using any die cut.


1.) Size: 12" x 5". From left to right (see picture below), score 1/2", then from that point score 2 7/8" three times. Score 3" from the top and then fold.


2.) This part will be tricky so please refer to the picture below. I hope you all could see where the vertical scores are on the bottom part of the paper. Starting from the bottom left side, on the first big square, score 1" two times creating 3 rectangles (the third one won't be a perfect 1" since the size of the square is 2 7/8"). Do not score all the way on the top. Just score the bottom part. Skip the second square. On the third square, do the same thing like the one from the first square.


3.) Trim parts of it. See below. And then fold.


4.) Use double-sided tape. This picture shows you where to put your tape for the outside part of the box.


5.) This picture shows you where to put your tape for the inside part of the box.


6.) Adhere together the two ends first. Tape the small end inside. Then adhere the bottom part together.


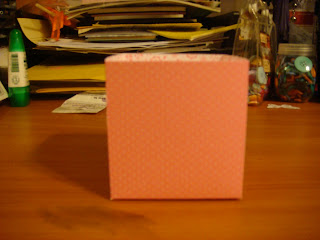
7.) This is how your box should look like.

(bottom part)


8.) Using a scallop edge punch, trim the edge of a black cardstock. Cut 1/2".


9.) Using a sticky tape, adhere the scallop edge paper inside the box.


10.) I decorated the front of the box with this sentiment. Inked the stamp with pink and stamped it on a white paper. Trim around it. Using dimensional (sticky foam or pop up tape), adhere it on a black cardstock. Trim around it. For this part, you can always use a different sentiment or stamp. Use your creative ideas to decorate your box.


This is the finished product. I used the box for a cookie favor. Tied the plastic bag with a pink dots ribbon to match with the pink dots paper that I used to create the box.

Sponsors

Sizzix 468x60 Banner Quirks of Art - Scapbook & Rubber Stamping Supplies Scrapbooking Coupons