Thursday, November 4, 2010

Birthday Presents...

Happy Thursday! It's almost weekend again...time's flying by sooo fast..way too fast. Anyways, just a quick one today because it's already 1 am and I have to work at 7 am. I created this card for another 1st birthday boy. I tell you, too many birthday boys, baby shower for boys, and most of the women that I know that are pregnant are having a boy. What's up with that?


Thanks for stopping by. Have a great day!

~Pam~

Tuesday, November 2, 2010

Cupcake, anyone?

Hello Everyone! I made this card for my grandson (hahaha...i meant godson, what was i thinking?? way too early to have grandson). He just turned one last week. It was kind of a last minute card (made it the night before) but I think it turned out good for a boy card.


I just recently purchased my first automated cutting machine. After doing a thorough reviews and comments of the different cutting machine, I finally decided to buy the Sizzix Eclips. I used the starter cartridge that came in the box to cut the name. It was very easy and I am happy I bought this machine. I'm still trying to get to know the machine and as I learn more stuff, I would gladly share it here in my blog.


Thanks for stopping by. Have a Blessed Week! :)

~Pam~

Sunday, October 31, 2010

Thank You Card

Happy Sunday Everyone! Yes, it's October 31st, and most of everyone will be dressed up in their favorite costumes. We really don't do Halloween costumes and stuff, so as an alternative, our church, Word of Life Christian Center in Honolulu, is having a Family Fun Night from 5pm-9pm. They will have tons of games, prizes and candies for kids and the whole family. What a great way to spend time with family and friends! So if you're looking for something to do tonight, come by and bring your whole family and have some fun!

Anyways, unto this card. My daughter's teacher left the school to take opportunity of another job that was offered to him. So my daughter asked me to make a card for him. Yes, it was for a guy and again, I had to limit myself and make everything simple for a guy card. So here's what I came up with. I also embossed the flap part of the envelope (saw this idea from a catalog).  


Thanks for stopping by. Whatever you've decided to do tonight, please be safe and have fun!

~Pam~

Wednesday, October 13, 2010

Calling All Crafters! Anyone interested to take over a booth in a Craft Fair?

Hello everyone! Is anyone interested to take over a booth in Hickam Fall Craft Fair on November 13, 2010 from 9 am to 3 pm? The booth has already been paid, just need someone to take over it. This is a perfect opportunity to showcase and sell your products. Please comment here or email me (by clicking view my complete profile and contact email) your personal information (name and contact #) and your products information by Sunday, October 17. Please feel free to pass on this information to your fellow crafters.

NOTE: THIS IS FOR HAWAII RESIDENTS ONLY.

Thank you so much! Be Blessed everyone!

~Pam~

Saturday, October 2, 2010

Boy Card

Happy Saturday! And yes, it is a happy Saturday because I am finally off from work. But my family and I are off to a birthday party - so not that much resting for this weekend. I made this simple card (just this morning) to honor the birthday celebrant who just turned two. It's a very simple and boyish card - and I have very happy because it's very challenging to make boy cards.


Thank you for stopping by. Have a safe and blessed weekend! Enjoy it with your family.

~Pam~

Friday, September 24, 2010

Simple Birthday Card...

Happy Friday Everyone! It's the weekend again and most of you will be off and I will be working. Hopefully it won't be a busy and  stressful weekend . My kids are going to Chuck E Cheese tonight for their cousin's birthday so I decided to make her a simple birthday card. Hope she'll like it.


Enjoy your weekend everyone! Be blessed :)

~Pam~

Thursday, September 23, 2010

Oh Boy! It's a Boy!

Hello Everyone! It's time for me to make another card for a baby shower, and this time it's for a baby boy. I believe I will be attending 3 baby showers in a week. I am happy that these 3 couples are blessed with a wonderful gift from God. Anyways, here is a simple card that I made. It's kind of hard to make a boy card but I think this one came out good.


Thanks for stopping by. Have a blessed and wonderful day!

~Pam~

Wednesday, September 22, 2010

Pink Baby Shower Card

Hello Everyone! I made this card for the baby shower I will be attending this weekend. She is having a baby girl so yea, i gotta used the girly color (pink!). I made the giraffe pink! Isn't it cute? I will also be entering this for the Flutter by Wednesday challenge. This week's challenge is open to all winged things - create anything that has wings!!! So if you'd like to join, just hop on to their blog.


Thanks for stopping by. Have a Blessed and Wonderful Day!! :)

~Pam~

Sunday, September 12, 2010

Coaster Post-it Note

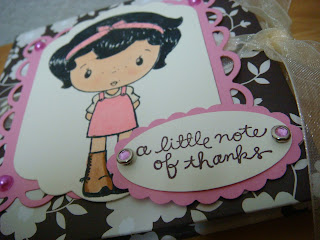
Happy Sunday Everyone!!! I made this coaster post-it note, inspired by Andrea Walford. I saw one of her tutorials on how to make a coaster post-it note and I was so inspired that I wanted to make one and designed it on my own. This is also my first time coloring using copics. I've been watching tutorials on how to use copics and I hope that Belle came out ok. How do you think I did on this one? I think she's soo sweet and pretty in pink.

I used two 4x4 coasters as the holder for the post it note. Covered the coasters with a designer paper. And placed them on a sheet of cardstock (the inside part).


A closer look of the sentiment where I added a pink rhinestone brad...

A closer look of Belle...


Another view of the coaster post-it note...

The inside part...


I hope you all like it! Have a great Sunday! :)

~pam~

Thursday, September 9, 2010

Christmas Tag Holder & Tag Swap

Hello everyone! Sorry, this is just going to be a quick one. I'm on my way to church tonight. Anyways, this is a Christmas Tag Holder and I will be entering this to Christmas Stampin All Year Long challenge. The challenge is to create a Christmas Tag Holder. What is cool is that they have a tutorial on their site on how to make it.

*** And because I was in a rush to post this blog, I totally forgot to mention that I will be giving these christmas tags and the holder to my partner, Sherri. I hope she'll like these tags. I participated on Kyoko's monthly christmas tag swap, where we have to create 3 identical christmas tags. If you'd like to participate, check out Kyoko's blog for more info.***

So this is the inside of the tag holder...

one of the tags (sorry kind of blurry)...

outside of the tag holder...

hope you all like it! :)

~pam~

Friday, September 3, 2010

Season's Greetings from Hello Kitty

Hello everyone! Gosh, time went by so fast...it's already September. It's time to make those holiday cards/projects, which I know some of you must've started already. Today, I am posting a Hello Kitty Christmas card.


I stamped a white paper with different shapes/sizes of snowflakes and then embossed it (hope you can see it). I dressed up Hello Kitty in pink to match with the color of the snowflakes (yes, pink snowflakes lol!) and then added white dots on it (not sure what the name is). I tend to do that, go to a craft store, look around, buy something that I think I'll use but dont even know the name. Well, I can call it a "thing". I know some of you can relate to me. Back to my card, then I added stickles around the sentiment.


This Christmas card is sooo pink. I guess you'll know that I love pink (lol). Hope you all like it. Have a wonderful Friday. Thanks for stopping by.

~Pam~

Wednesday, September 1, 2010

Sparkling Reindeer

Hello Everyone! Here's another Christmas card that I made. I got the idea of putting different color crystals on the reindeer's horns so it would sparkle from their magazine. The reindeer is from hero arts holiday collection.


A closer look of the reindeer...

I hope you all have a wonderful day :)

~Pam~

Tuesday, August 31, 2010

Yellow Christmas Tree

Good day everyone! Today is my second day off :) and I decided to do more Christmas cards. I will be selling these cards and other projects that I've been doing for the craft fairs that I'll be attending on November and December. More info to come as the dates come closer.

Anyways, here is yellow christmas tree. I embossed it using Egyptian gold. The border/corner is from the fanciful holiday nesties and then I added xmas red stickles on it.


A closer look of the embossed yellow christmas tree.

I hope you all enjoyed it. Have a good day!

~Pam~

Hello Butterfly

Hello! It's been a long time since I posted here in my blog. I took a break from posting but I was still creating projects, it was just that I was not posting them :(  I actually became a follower of some of the blogs that I have been reading recently. I was inspired by their creations that I thought I need to get back on my own blog. I will also start participating on some challenges and RAKs. This will be my first time to join a challenge. I will be submitting this card to Flutter By Wednesday and Christmas Stampin' All Year Long. The challenge this week for Flutter By Wedneday is an open (which is good for a first timer because I can do anything I want) as long as your creation has a butterfly, fairy or angel on it. The challenge this week for Christmas Stampin' All Year Long is to create a non-Christmas card. I wasn't a fan of butterfly but after seeing all their creations, I wanted to make one myself. So here is what I came up.


A closer look of the word "hello". I embossed it with aegean silver embossing powder.


A closer look of the butterfly... I added waterfall stickles on the wings. And I added turquoise stickles on the scallop nesties.


Hope you all like it! :) Have a bless and wonderful week everyone!


~Pam~

Tuesday, July 13, 2010

Favors: Bag with Scallops

Hello Everyone! We will be making a favor called bag with scallops. I used a big shot machine and a die cut from sizzix called bag with scallops. Here's a picture of the favor:


1.) When you use the die cut, here are the different parts that you'll have: the body and the 2 sides.


2.) Fold where the score linings are.


3.) Use double-sided tape to adhere the sides of the bag. This picture shows you where to place your tape.


4.) Adhere the bottom side first.


5.) Adhere the other bottom side.


6.) Adhere the sides.


7.) I used velcro to closed the scallop tab. To do this, stick together both sides of the velcro and adhere one side first to the scallop tab. Remove the plastic of the other side of the velcro and place down the scallop tab (this will make the other side of velcro stick to the body of the bag - this will ensure that your velcro are placed properly and that they will stick together).


8.) Decorate your bag. I decorated my bag with ribbon on top, and a sentiment. Please do not forget to check out my sponsors by clicking the links on the right side or below this blog. Thank you.


Friday, July 2, 2010

Favors: Pink Dots Thank You

Hello Everyone! Here is another party favor idea. And since I received a good feedback about using pictorial tutorial, I will do my best to use pictures from now on. For this favor, we will be creating a box from a scratch without using any die cut.


1.) Size: 12" x 5". From left to right (see picture below), score 1/2", then from that point score 2 7/8" three times. Score 3" from the top and then fold.


2.) This part will be tricky so please refer to the picture below. I hope you all could see where the vertical scores are on the bottom part of the paper. Starting from the bottom left side, on the first big square, score 1" two times creating 3 rectangles (the third one won't be a perfect 1" since the size of the square is 2 7/8"). Do not score all the way on the top. Just score the bottom part. Skip the second square. On the third square, do the same thing like the one from the first square.


3.) Trim parts of it. See below. And then fold.


4.) Use double-sided tape. This picture shows you where to put your tape for the outside part of the box.


5.) This picture shows you where to put your tape for the inside part of the box.


6.) Adhere together the two ends first. Tape the small end inside. Then adhere the bottom part together.


7.) This is how your box should look like.

(bottom part)


8.) Using a scallop edge punch, trim the edge of a black cardstock. Cut 1/2".


9.) Using a sticky tape, adhere the scallop edge paper inside the box.


10.) I decorated the front of the box with this sentiment. Inked the stamp with pink and stamped it on a white paper. Trim around it. Using dimensional (sticky foam or pop up tape), adhere it on a black cardstock. Trim around it. For this part, you can always use a different sentiment or stamp. Use your creative ideas to decorate your box.


This is the finished product. I used the box for a cookie favor. Tied the plastic bag with a pink dots ribbon to match with the pink dots paper that I used to create the box.

Sponsors

Sizzix 468x60 Banner Quirks of Art - Scapbook & Rubber Stamping Supplies Scrapbooking Coupons